Shopify Liquid - The Ultimate Guide
Liquid is the templating language that Shopify uses to load dynamic content to the pages of online stores. You could consider it the programming language of Shopify themes but there are a number of restrictions and quirks within Shopify liquid that aren't immediately clear.
While Shopify's Liquid Reference and the famous 'Cheat Sheet' are great, I feel like there is a lot of details missing and that's why I decided to write my own documentation.
Strap yourselves in as this one is likely to be a big one!
The Basics
Shopify's documentation does a good job of explaining the basics.
We start with the two types of Liquid tags {{ code }}and{% code %}. Double curly braces for simply outputting data (much like other template languages like Mustache) and the curly brace combined with the percentage sign for everything else.
There's also the {%- code -%} tag, which operates the same as {% code %} but prevents the tag from generating whitespace in the output document.
The double curly braces tags are for your logic-less Liquid code while the curly-brace with percent symbol tags are responsible for other functions like
- Looping through Liquid objects and arrays
- Creating new named variables
- Including 'snippets' and linking 'sections'
- For loops, and
- If/else statements (conditionals)
Here's a very basic but common pattern in Liquid:
{% for product in collection.products %}
	{{ product.title }}
{% endfor %}
The above loop will cycle through the products in the collection and run whatever is inside the code block. In this case, it will output the title of the product.
Then, there's the objects and attributes themselves. As it says in the docs, 'objects contain attributes that are used to display dynamic content on a page' but objects can contain other objects as well. Objects in liquid are sometime iterable (almost like an array) and sometimes you can call the object without an attribute and receive a single value.
Basically, Objects in Liquid are all over the place but we'll get into that in the dedicated section on Objects later in this guide.
The final bit of syntax in Liquid are filters.
'Filters are used to modify the output of strings, numbers, variables, and objects.'
In other programming languages, you might expect these functions to be contained in a method but in Liquid, we can't create our own methods and functions. These sorts of 'helper functions' are limited to the available filters within liquid.
A filter always starts with a | (pipe symbol) and can be stringed together like such:
{{ product.title | upcase | remove: "AWESOME" }}For the above code, if product.title was "Awesome Shoes", then the output would be "SHOES".
Everything in Liquid can be summarised by Tags, Objects and Filters. So let's dive deep into each one of them now.
Before we get started...
This article is gonna go into a lot of depth and is by no means a quick read. Feel free to skip the parts you don't need and/or use the search function in your browser to search for the specific section that you want to learn about. I intend this post to be more of a reference than a tutorial.
If you're more interested in a getting up and running with Liquid right away, check out my Skillshare class on Shopify Theme Programming (Out now).
Ok, let's get back to the guide.
Liquid Objects
I'm gonna start with Liquid objects because no matter what you do within Liquid, most of the time you will be interacting with objects.
If we think about Liquid as the way to access and display store data then objects are the way we access that data in our Shopify themes.
Objects are a little tricky in Liquid though. Let me explain using two concepts that Shopify doesn't necessarily make clear in their documentation.
Concept 1: Object 'Styles'
In other programming languages, an object looks something like this person = { first_name: "Chris", last_name: "Dodd", age: 27 } but in Liquid an Object can return a single value, a collection of values or a bunch of key/value pairs. That's why I've broken the object down into different styles.
PS: This is not official Shopify Liquid terminology, just something I came up with to help me (and hopefully you too) to understand what the heck is going on with objects in liquid.
Array-Like Objects
These 'objects' are referred to as objects in Liquid but they operate more like arrays.
- Some can be iterated over and others can’t be.
- Some can be have their ‘items’ accessed by their handle but only when such a handle exists (similar to how associative arrays work in PHP).
As a whole however, these are objects that hold a collection (an array) of other objects.
Examples include:
- Pages
- Blogs
- Articles
- Images
Notice that these are all plural names, suggesting that these objects hold a collection of values, which they do.
Single-Value Objects
These objects have a single value that is outputted by calling the object itself.
Examples include:
- Canonical_url
- Current_page, and of course
- Handle
Traditional Style Objects
Traditional Style Objects are objects that hold attributes which in turn hold values that could be any kind of data type like strings, arrays and other objects. If you've worked with other programming languages before (like Javascript), this is what you would generally think of as an object.
Examples include:
- Product
- Customer
- Page
- Collection, and
- Article
Here's a quick code example showing all styles in use:
{% for product in collection.products %}
	{{ product.handle }}
{% endfor %}
In this example, collection is a traditional-style object, products is an array-like object and handle is a single value object - again, not official terminology, just a few labels to help you understand these objects' behaviour.
Concept 2: Object Nesting and Scope
While the official documentation goes into great detail with most of the objects in Liquid, it often fails to tell us where these objects are available.
For instance, you can read about all the attributes on the article object but it won't tell you where in your theme you have access to it or which objects you will find it nested under.
Some objects you can access from anywhere in your theme but most are specific to certain templates and that's why I decided to go through every object in Liquid and find out for myself.
Object Reference
Let's go through all the objects listed in Shopify's documentation and learn more about them, categorising each by scope, nesting and style.
Note: I won't go into all the individual attributes (as Shopify already does a great job at that)
Also note: feel free to skim-read this section and come back to it after Tags and Filters. It's not required to know of every object in Liquid but it's here in case you need it
Global Objects
The following objects are available from wherever inside your theme.
all_products
global, array-like, non-iterable
all_products is a non-iterable array-like object. As the name suggests it's used to gain access to any product from anywhere within your theme.
While the all_products object contains a collection of objects (ie. array-like), you can't actually loop through them (ie. non-iterable). Instead, you can access a specific product from all_products using the handle of specific product you want to access (see 'Accessing handle attributes' on the official documentation)
{{ all_products['wayfarer-shades'].title }}pages
global, array-like, non-iterable
Used to access specific pages from anywhere in your theme via the page's handle.
By the way, you can access a resource (eg. a page, product or an image) via its handle by using the square bracket syntax (as above) or the dot syntax (like below)
<h1>{{ pages.about.title }}</h1>blogs
global, array-like, not iterable
Just like all_products and blogs, you can access the different blogs of your website (you can have multiple on the same site) via the specific handle of the blog.
<h1>{{ blogs.myblog.title }}</h1>The above code will output the title of the blog with the handle 'myblog'.
articles
global, array-like, not iterable
Just like all the global objects above, you can access any article in your store via its handle.
images
global, array-like, not iterable
You can access any image in your store via its filename (similar to how you would access another resource using it's handle).
collections
global, array-like, iterable
Unlike all the previous global objects mentioned, you can loop through all the collections available in your store in addition to accessing a specific collection via its handle using the collections object.
{% for collection in collections %}
	{{ collection.title }}
{% endfor %}
The above code will loop through all the collections in your store and output the title of each.
linklists & links
global, array-like, iterable
Linklists represent the menu structure you've set up in the 'navigation' section of your online store admin.
You might be wondering why Shopify didn't just call the object a 'menu' but calling it a 'linklist' instead helps you to think more open-mindedly about these array-like objects.
Perhaps in future, you may want to display a list of links that aren't necessarily a 'menu' and the linklist object lets you do that as well.
Just like the collection object, you can loop over linklists or access a particular linklist by its handle. Once inside a linklist, you can access its links via its links attribute, which will give you an iterable list to loop through.
The tricky thing with linklists and links though is that a single link can have a links object attached to it as well and that's how you are able to access the sub-links within that link (note: this is limited to three layers deep in Shopify).
For these nested sub-links, a common convention is to label the second layer of links 'childlinks' and the third as 'grandchildlinks' to make it easier to understand.
{% for linklist in linklists %}
	<div>
    	<h2>{{ linklist.title }}<h2>
        <ul>
        	{% for link in linklist.links %}
            	<li>
                	<a href="{{ link.url }}">{{ link.title }}</a>
                	<ul>
                    	{% for childlink in link.links %}
                        	<li>
                            	<a href="{{ childlink.url }}">{{ childlink.title }}</a>
                                <ul>
                                    {% for grandchildlink in childlink.links %}
                                        <li>
                                        	<a href="{{ grandchildlink.url }}">{{ grandchildlink.title }}</a>
                                        </li>
                                    {% endfor %}
                                </ul>
                            </li>
                        {% endfor %}
                    </ul>
                </li>
             {% endfor %}
         </ul>
    </div>
{% endfor %}
As you can see from above, the nesting gets pretty hectic when you have menus that are three layers deep.
request
global, traditional-style
The request object is a simple helper object to give you access to the domain a customer is visiting from, the shop_locale (ie. the language) of the user and the path to the current page.
Read more on the official documentation.
scripts
global, traditional-style
If your store is on the 'Shopify Plus' tier of Shopify, you have access to what's called 'scripts'.
Scripts are used to create discounts that are applied to a cart and/or to customize the shipping and payment options that are available to your customers.
Shopify scripts are written in Ruby and use the Shopify Scripts API.
If you're interested, read about it on the official docs but as less than 1% of Shopify stores are on Shopify Plus, it won't be particularly relevant for most users
settings
global, traditional-style
The global settings object lets you access the settings of a store's published theme.
Remember that settings are defined through the settings_schema.json file in your theme and the stored values are in the settings_data.json file.
This differs to the settings object that is attached to particular sections (which we'll talk about a little later).
cart
global, traditional-style
The cart object is available from wherever in your Shopify theme and as the name suggests, it holds all the information you might need to access about your shopping cart (such as all the cart items and the total price).
Read more about the cart object on the official docs.
customer
global, traditional-style
The customer object represents the customer that is logged in to the store. Although it is available as a global object, it will only return an object if a customer is logged in.
{% if customer %} Hello {{ customer.first_name }} {% endif %}The above code checks if a customer is logged in first before rendering the text.
Read more about the customer object on the official docs.
shop
global, traditional-style
The shop object contains information about your store like its name, domain and physical address.
theme
global, traditional-style
The theme object allows you to access the id and name of the theme in use.
routes
global, traditional-style
This object is not listed as global in the Shopify docs but appears to be available from anywhere within your theme.
The object allows to generate dynamic URLs to your storefront. Learn more on the official docs.
canonical_url
global, single value
The canonical_url object returns the canonical URL for the current page. The canonical URL is the page's "default" URL with any URL parameters removed.
current_page
global, single value
current_page returns the number of the page you are on when browsing through paginated content.
page_description
global, single value
page_description returns the meta (SEO) description of currently viewed page.
The word 'page' in this instance does not refer to the page object/content type in Shopify but rather, any page the user might be looking at, whether that be a product, collection, blog article or Shopify page.
page_title
global, single value
Just like page_description, page_title refers to the SEO title of the currently viewed page.
This differs from page.title which is the title of a particular Shopify page whereas page_title is any page in your store that your customer is viewing.
I know! The terminology overlaps a little but hopefully that makes sense.
handle
global, single value
The handle object is Liquid is a very special one. You can think of it as a unique but human-readable identifier that can be used in various ways.
Just like we saw before, we can use a resource's handle to access that particular object from one of the previously mentioned, blogs, articles, collections, pages or products global objects.
{% for product in collections.featured.products %}
	{{ product.title }}
{% endfor %}
The above code loops through the products contained in the 'featured' collection and outputs the title of each product.
We can also call the handle object directly on any page to check whether we're on a certain page.
{% if handle contains 'private' %}
	Don't show this to anyone! ok?
{% endif %}
You might be thinking where does this 'handle' come from? The answer is that Shopify automatically generates it for you based off of the title you set for the resource.
For example, if you created a page called 'About Us', the handle would look something like this: 'about-us'.
Learn more about how to change your handle in the Shopify admin here
template
global, traditional and single value (both)
The template object defies convention as it will return a single value when called directly but also has attributes.
If you call template (the name by itself), you will get the name of the template that is being used to render the current page but can also access the name of the template's parent directory (usually just templates) through the directory attribute, its 'suffix' (for when using an alternate template is being used) through the suffix attribute and strangely enough, the name of the template through the name attribute.
Template-specific Objects
The following objects are only available in their respective templates (unless accessed as a nested object).
- product
- page
- search
- collection
- article
- blog
- cart
- checkout
These objects all follow a common pattern in that their names match the template in which they are available. For example, the product object is available in the product template.
Special mention: the 'section' object
The section object is what you use to access section data in a given section.
The section data of course, is determined by the JSON 'schema' that you create inside the section file combined with the user input through the theme customiser.
I'm breezing over JSON schemas a little bit here as this post is all about Liquid but you can learn all about JSON schemas in lesson 5 of my Skillshare class, 'Shopify Theme Programming'.
For more info on the section object in Liquid, Check out the official docs
Nested Objects
Many of the afore-mentioned objects also have objects inside them and some of these nested objects can appear in multiple places. So let's list out all these nested objects and under which objects you'll find them.
address
checkout, customer, order and shop
The address object comes in a few different forms.
shop.address represents the address of your shop whilst billing_address and shipping_address are two manifestations of the address object that exist on checkout, customer and order objects.
All of these objects can be summarised by one address object as they all have the same attributes which let you access the various parts of the address such as the first line of the address, the city and the country.
Learn more about the address object on the offical docs.
block
section
Blocks are a feature of Shopify sections that allow the user to add and remove a list of 'blocks' which contain a common set of settings.
A particular block can be accessed by looping through the blocks object nested on the section object.
To learn more about blocks, check out this page on the official documentation.
setting
section, block
The setting object holds the attributes of a setting on either a block or section.
For example, the value of the 'image' setting for a particular section can be accessed using section.settings.image
currency
cart and shop
The currency object exists in two different places.
One, as an item on shop.enabled_currencies and second, nested in the cart object.
You can use this object to determine the name, ISO code and symbol of each currency that your store enables or the currency of the cart (respectively).
discount_application
cart, checkout and order
The discount objects in Liquid are a little tricky. The discount application_object exists as an item within discount_applications and cart_level_discount_applications both of which are passed around the cart, checkout and order objects.
As you would suspect, all of its attributes are related to the application of discounts.
Find out more on the official docs.
discount_allocation
line_item
I haven't been able to track down many examples of this object in use but it appears to be a way to access discount information on the line_item object specifically.
Check out this article on Shopify's website for more info.
line_item
cart, checkout, fulfilment and order
Speaking of the line_item object, this object is what you get when you loop through cart.items, checkout.line_items, order.line_items or fulfillment.fulfillment_line_items.
The object represents a single line in the shopping cart and given that there is just one line item for each distinct product variant in the cart, you can think of a line_item as tightly coupled to a product variant.
You'll see a few objects that get shared amongst cart, checkout and order as these objects all share a similar composition with their names mainly representing the state of an order moving through the various stages, all the way from the customer placing their first item in the cart to having that order fulfilled.
The line_item object has a lot of properties which you can read about on the official docs.
shipping_method
checkout
The shipping_method object is a simple one. It is available on the checkout object and gives you access to the handle, price (both original and current) and title of the shipping_method.
fulfillment
line_item
The fulfillment object appears to be a nested object of the line_item object in Liquid with which you can expose fulfilment details about a product in a customer order.
After searching through numerous themes, the best example I could find of the fulfillment object is this one in Shopify's own Debut theme.
{%- if line_item.fulfillment -%}
	<div class="note">
    	{%- assign created_at = line_item.fulfillment.created_at | time_tag: format: 'date' -%}
        {{ 'customer.order.fulfilled_at_html' | t: date: created_at }}
        <div>
        	{%- if line_item.fulfillment.tracking_url -%}
            	<a href="{{ line_item.fulfillment.tracking_url }}"> {{ 'customer.order.track_shipment' | t }} </a>
            {%- endif -%}
        	<div>
            	{{ line_item.fulfillment.tracking_company }}
               	{%- if line_item.fulfillment.tracking_number -%}
                    #{{ line_item.fulfillment.tracking_number }}
                {%- endif -%}
            </div>
       </div>
   </div>
{%- endif -%}
Judging from the above code, the fulfilment object is an object for accessing information about the fulfilment of a product (represented as a line item) in a customer order.
You can always head to the official documentation to learn more about it but as usual, Shopify leaves a lot to the imagination.
image
collection, article, product, variant and line_item
The use of the image object is pretty common sense. It allows you access the image of a collection, article, product, variant or line_item.
To display an image, you might simply use the image.src attribute in your own HTML tag but you're also able to pass the image object through some helpful image filters as well.
Check out all the attributes you can access through the image object here on the docs.
variant
product, image and line_item
The definition of a variant is something that confused me when I first started working with Shopify but it's easy to understand once you grasp it.
You can think of a variant as the actual product that you deliver to the end customer.
You might sell a particular type of shoe that comes in various sizes and colours. Each variation of that 'product' is a 'variant' in Shopify. If the shoes vary only by size then you will have as many variants for that product as you do size options but if you have other options (for colour and material, let's say), the number of variants grows exponentially as the number of possible combinations are multiplied.
The variant object is usually accessed via product.variants but you can also find the variants that are associated with images and line items via image.variants and line_item.variant.
Variants are important in Liquid because the variant (not the product) is what gets added to your cart and turned into line items.
Read more about variants on the official docs
product
collection and line_item
The product object (in addition to being available in the 'product' template) is also a nested object, available in collection.products and line_item.product.
collection.products is how you would access the products in a particular collection and line_item.product gives you access to the product that is represented in the line item.
Learn more about the product object on the official docs
transaction
checkout and order
I've never had to use the transaction object but it appears from the transactions attribute on the checkout and order object, that an order can have multiple transactions and that this object is how you would access them in Liquid.
policy
shop
A policy represents an individual policy of the shop.policies object.
You can also access an individual policy via shop.privacy_policy, shop.refund_policy, shop.shipping_policy and shop.terms_of_service.
metafield
product, collection, customer, order, blog, page and shop
Metafields are an interesting functionality in Shopify that allow you to create your own datasets and include them on products, collections, customers, orders, blogs, pages and your shop.
A metafield consists of a namespace, a key, a value, and a description (optional).
I won't go into too much detail about metafields as you can read about it on the docs but in terms of including metafields in your Liquid code, you can access them via the metafields object, nested on the previously mentioned resource objects, followed by the namespace of the metafields you want to access.
tax_line
order and checkout
This one is pretty basic. If there's a tax line on your checkout or order, this is where you would access it.
order
customer and checkout
The order object is usually found on customer.orders but can also be found attached to the checkout object.
Orders should be pretty easy to understand, they are essentially the future manifestation of a cart that has passed successfully through a checkout.
product_option
product
The product_option object is what you get when you loop through product.options_with_values and contains the name of the possible product options and the possible values within it (among a few other attributes).
collection
product
Like product, collection is a template-specific object that you can can also find nested.
Not only can access a list of products in a particular collection with collection.products, you can also grab the list of collections that include a particular product via product.collections
result
search
A 'result' is what you get when you loop through search.results. result is a special object in that it can be an article, page or product. So, it's not exactly a separate object but a alternate name for the article, page or product object that you retrieve from the list of results on a search page.
user
article
user is a simple object that appears on the article object. Inside you'll find information about the article's author.
Read more about the user object on the official docs
comment
article
Similar to user, comment is just the object you would use for retrieving information about a particular comment on an article and can be accessed via article.comments
article
blog
In Shopify you can have multiple blogs and so you would usually display articles by looping through the list of articles on a particular blog via blog.articles
Of course, once you navigate to a particular article, you will have access to the article object. The nested form of this object is for when you're on the blog template.
Read more about the article object on Shopify's official docs.
Helper Objects
I call the following objects 'Helper Objects' as they simply help us to program in Liquid instead of giving us access data from within our store like the others mentioned above.
forloop
The forloop object contains attributes of the parent for loop. You can use it to find out the length of the current loop or your position within it (amongst a few other things).
You can read more about the forloop object here
font
The font object helps you to access specific details of a font on the settings object.
You can read more about the font object here.
form
Similar to the forloop object, the form object provides attributes for use within the {% form %} Liquid tag.
paginate and part
Just like the form object, the paginate object provides attributes for use within the {% paginate %} Liquid tag. The part object is what you'll find nested on the paginate object via paginate.parts. A 'part' simply represents a link in the pagination's navigation
More on the paginate object here
tablerow
The tablerow object is essentially the same as the forloop object but for tablerows instead.
You can read more about the tablerow object here
Other Objects
Finally, there are a few objects in Liquid that don't quite fit into the previous categories. Some of these appear to be weird quirks of the language while others can be useful.
customer_address
The customer_address object has a lengthy page in Shopify's official documentation but I personally have never seen it used and it appears to be redundant given that you can access a customer's address via customer.addresses.
discount
The discount object may be found in the code of older themes but in the current version of Liquid, this object is just for displaying discounts inside notifications or in the Order Printer app. Therefore, it is no longer relevant for theme development.
recommendations
The recommendations object in Liquid is a strange one. It is essentially a striped-down collection object that is auto-generated by Shopify via their own algorithm and can be used on the product template to display recommended products.
The reason why this object is so strange is that you need to use Shopify's AJAX API in addition to a Liquid loop to get it to work.
<div id="recommended-products">
	<h2>Recommended: </h2>
    {% if recommendations.products_count > 0 %}
        {% for product in recommendations.products %}
            {{ product.title | link_to: product.url }}
        {% endfor %}
    {% endif %}
</div>
The above code should be enough to render the recommended products to the page but it isn't
As it states in the official docs,
The recommendations object returns products only if it's used in a theme section that's rendered via /recommendations/products?section_id=[section_id]&product_id=[product_id]It took me a while to figure out that the above url was a endpoint of the AJAX API and that in order to get the recommended products to show, you have to add some extra data attributes to the parent div, add in the If statement for recommendations.performed and include the code in its own section.
The Liquid code turns out looking more like this:
<div id="recommended-products" data-product-id="{{ product.id }}" data-limit="5">
	<h2>Recommended: </h2>
    {% if recommendations.performed %}
    	{% if recommendations.products_count > 0 %}
        	{% for product in recommendations.products %}
            	{{ product.title | link_to: product.url }}
            {% endfor %}
        {% endif %}
    {% else %}
    	<div class="placeholder">[Placeholder animation goes here]</div>
    {% endif %}
</div>
Then you need to send the whole section to the AJAX API, the API will respond with the client-side code and then, you will render that to the page using something like this:
function ProductRecommendations(container) {
var $container = (this.$container = $(container));
var productId = $container.data('product-id');
var limit = $container.data('limit');
var productRecommendationsUrlAndContainerClass = '/recommendations/products?§ion_id=product-recommendations&limit=' + limit + '&product_id=' + productId;
$container.parent().load(productRecommendationsUrlAndContainerClass); };
document.addEventListener("DOMContentLoaded", function() {
ProductRecommendations($('#recommended-products'));
});I figured this out by reading a few articles on Shopify's website as well as studying how the object is used in popular themes.
It's not clear to me why you would need to involve Javascript at all but I guess this is just another quirk of Shopify.
country_option_tags and all_country_option_tags
The all_country_option_tags object creates a HTML tag for each country and the country_option_tags object does the same but all for the countries that are included as a shipping zone on the Shipping page of the admin.
These are handy if you want to create a dropdown (<select><option>dropdown</option></select>) with these countries as options.
current_tags
The current_tags object can be used inside the blog and collection templates and contains all the tags that are being used to filter that collection or blog.
A common use and pattern for the current_tags object can be seen in this example in the collection template
<ul>
	{% for tag in collection.all_tags %}
        {% if current_tags contains tag %}
            <li class="active">{{ tag | link_to_remove_tag: tag }}</li>
        {% else %}
            <li>{{ tag | link_to_add_tag: tag }}</li>
        {% endif %}
    {% endfor %}
</ul>
Liquid Tags
Alright, so that was probably more words on Liquid objects than anyone would want to read in one go. So now, let's look at how we can combine these objects with useful tags to help our themes to do what we need them to do.
As previously mentioned, if you want to simply output a value - whether that be data from your store or a variable created inside Liquid - you simply use the curly braces.
{{ product.title }}The rest of the tags can be categorised as:
- Control flow tags
- Iteration tags
- Variable tags, or
- Theme tags
Control Flow Tags
Control flow tags are basically just conditionals and they're quite common-sensical. They include If/then statements, unless/else statements and switch statements.
If / Then
If a condition is true, perform some code, if not, perform some other code - quite simple.
{% if shipping_method.title == 'International Shipping' %}
	You're shipping internationally. Your order should arrive in 2–3 weeks.
{% elsif shipping_method.title == 'Domestic Shipping' %}
	Your order should arrive in 3–4 days.
{% else %}
	Thank you for your order!
{% endif %}
Unless / Else
The opposite of an If statement, an Unless statement performs some code if the condition inside the unless tag is not true.
{% unless product.title == 'Awesome Shoes' %}
	You are not buying awesome shoes.
{% endunless %}
Case / When
A Case (or switch statement, as you might of heard it being referred to in other languages) tests a particular object or attribute for a range of values.
{% case shipping_method.title %}
	{% when 'International Shipping' %}
    	You're shipping internationally. Your order should arrive in 2–3 weeks.
    {% when 'Domestic Shipping' %}
        Your order should arrive in 3–4 days.
    {% when 'Local Pick-Up' %}
        Your order will be ready for pick-up tomorrow.
    {% else %}
        Thank you for your order!
{% endcase %}
The above code checks if the value of shipping_method.title is 'International Shipping', 'Domestic Shipping', 'Local Pick-Up' or none of the above and for each of these scenarios runs a different line of code.
The thing to note with conditionals in Liquid are the helpful but tricky truthy and falsey values.
If you're experienced with programming in Javascript for instance, you would be aware of truthy and falsey. It's a concept in which values that aren't explicitly false or true can still sometimes evaluate to true or false.
A similar concept applies in Liquid and a common pattern with conditionals is to check if a certain object exists before outputting. We can do this simply by including the object that we want to check directly after the If keyword without any comparison operators.
{% if item_title %}
	{{ item_title }}
{% else %}
	Object with the name item_title does not exist
{% endif %}
In the above example, the text Object with the name item_title does not exist will output unless you created your own Liquid variable with that name.
The exception is blank objects or values (ie. ones where the value is " " or that don't exist at all). These are considered truthy in Liquid. So if you expect an object could contain an empty string value or may not exist at all, you can check whether the object is blank using the blank keyword.
{% if item_title != blank %}
	{{ item_title }}
{% endif %}
This works the same for array-like objects but instead of checking for blank, you need to check the length of the array-like object via it's size attribute.
{% if article.tags.size > 0 %}
	{% for tag in article.tags %}
        <a href="{{ blog.url }}/tagged/{{ tag | handle }}">{{ tag }}</a>
    {% endfor %}
{% else %}
	No tags
{% endif %}
Note that an object that does not exist in Liquid is sometimes known as an EmptyDrop.
Iteration tags
We've already seen a few examples of Iteration Tags already. The most common form is a for loop.
For Loop
{% for product in collection.products %}
	{{ product.title }}
{% endfor %}
The text after the 'in' on the first line represents the array-like object that you want to loop through and the text between the 'for' and 'in' represents an individual object which you can call inside the code block (ie. inside the the opening for and closing endfor tags).
The for loop basically works the same as a for loop in any programming language with the exception of the else statement, which saves you from having to check that an array-like object is empty with an if statement.
{% for product in collection.products %}
	{{ product.title }}
{% else %}
    The collection is empty.
{% endfor %}
Then there's the break and continue keywords which (when called) break out of the loop or skip the current iteration of the loop respectively. These can be handy for more complex Liquid patterns where you're trying to find a particular object within a collection of objects.
There's also the limit, offset, range and reversed parameters but in my experience, they aren't all too common. You can learn more about them in the official documentation.
Cycle
Cycle is a special iteration tag that works when nested inside a for loop. You can use cycle to loop through a group of strings and output them in the order that they were passed in as parameters.
When you first learn Liquid, it's not immediately clear why you would want to use cycle but I have found one instance where it is used in popular themes and that is to assist in the display of placeholder images.
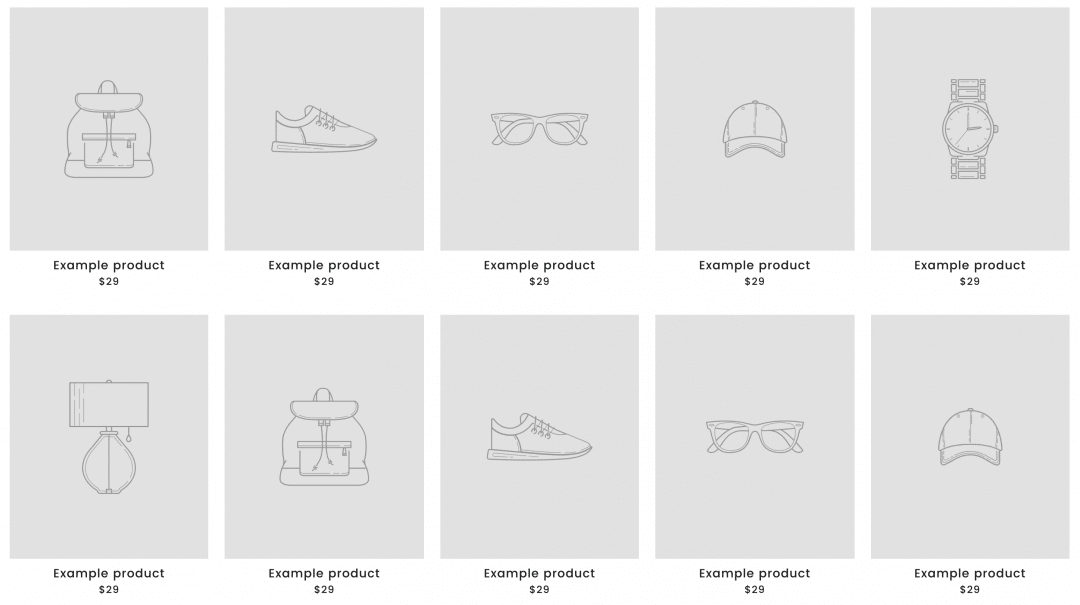
The above is generated by the following code.
<div class="grid grid--uniform">
	{% for i in (1..product_limit) %}
    	<div class="grid__item grid-product {{ grid_item_width }}" data-aos="row-of-{{ per_row }}">
        	<div class="grid-product__content">
            	<a href="{{ product.url | within: collection }}" class="grid-product__link {% if sold_out %} grid-product__link--disabled{% endif %}">
                	<div class="grid-product__image-mask">
                    	{% capture current %}{% cycle 1, 2, 3, 4, 5, 6 %}{% endcapture %}
                        <div class="image-wrap">
                        	{{ 'product-' | append: current | placeholder_svg_tag: 'placeholder-svg' }}
                        </div>
                    </div>
                    <div class="grid-product__meta">
                    	<div class="grid-product__title">
                        	{{ 'home_page.onboarding.product_title' | t }}
                        </div>
                        <div class="grid-product__price">$29</div>
                    </div>
               </a>
           </div>
      	</div>
  	{% endfor %}
</div>
On line 7 of the above code, you can see the cycle statement. On the first iteration of the loop, the output of the cycle statement will be 1 and that will be assigned to the current variable for use in the next line to tell Shopify which placeholder image to show. On the second iteration, the value will be 2, so-on and so-forth until the seventh iteration, at which point the value will loop back to 1.
This is important as there are only 6 product placeholders that Shopify provides and so if you just used the index, you would get an error once you started to look for number 7. Instead (as you can see from the image), the image for the seventh placeholder is the same as the first and the cycle repeats itself.
The funny thing is that I was able to achieve the same result by replacing
{% capture current %}{% cycle 1, 2, 3, 4, 5, 6 %}{% endcapture %}with
{% assign current = forloop.index0 | modulo: 6 | plus: 1 %}So cycle appears to be another quirk of the language and one that I can't see as particularly useful.
Tablerow
Finally, there's tablerow which generates rows for a HTML table.
Such a result can be achieved quite easily using a for loop as well so I'm not sure why Shopify decided to create this particular iteration tag.
I suppose that when you include the 'col' parameter you're able to create tables with less code. I've never seen a need for this particular tag, I'll refer you back to the documentation if you want to learn more about it.
Variable Tags
Variable tags give us theme developers the ability to organise and section our code better by storing data from our objects and attributes into meaningful variables.
They are also handy for creating boolean flags. For instance, when we might switch a variable to true if a certain condition has been matched in a loop.
Variables in Liquid work quite similarly to how they exist in most programming languages but in Liquid, we use the assign keyword.
assign
In Liquid, you use assign for both declaring and assigning a variable.
{% assign current_collection = collection %}The above code helps to make the code in the collection template more readable by calling the collection object 'current_collection'.
We could also assign a value of a number or string just as well.
{% assign colour = '#7ab55c' %}You'll find that assigning your own variables can be essential when doing complex patterns in Liquid.
capture
The capture tag 'captures' the string inside of the opening and closing tags and assigns it to a variable. This is how you can perform string concatenation in Liquid (ie. the process of adding strings from various sources together.
{% capture url %}/collections/{{ collection.handle }}{% endcapture %}
{{ collection.title | link_to: url }}
The example above combines the text '/collections/' with a collection's handle to form a url variable that is then used on the next line to create a link with that collection's title.
increment and decrement
increment creates a new number variable, and increases its value by 1 every time increment is called on the variable while decrement does the same but decreases the value by 1 instead.
It might be handy as a shorthand to using the plus or minus filter but the major difference is that both increment and decrement will automatically output the new value when called.
Theme Tags
Theme tags include other functions that assist in theme development. They can be used for pagination, theme structuring and more.
layout, section and include
Layout, section and include are all tags that assist in theme structure.
By default, any template will load with the layout in the theme.liquid file but you can set a template to load with a different layout using the layout tag at the top of the file with the name of the file you want to load (without the .liquid file).
{% layout 'full-width' %} The above code will load the full-width.liquid layout file.
As for the section and snippet tags, they simply load a section directly inside the place where they are called.
Snippets can be included anywhere (including other snippets) while sections can be included in layout and template files. They work just like the layout tag.
{% section 'header' %} {% include 'snippet' %}Note that you can also pass variables into snippets but you can learn more about that on the official docs.
For a primer on Shopify theme structure check out the third video in my YouTube series on Shopify Theme Development.
comment
The comment allows you to leave un-rendered code inside a Liquid template. They work the same as comments in any other programming language.
{% comment %} Store product title in a variable {% endcomment %}
{% assign product_title = product.title %}
form
The form tag helps you to create a forms in Shopify. It renders a HTML <form> element along with the required <input> elements to submit the form to a particular endpoint.
To use the tag, include the form type and any parameters to the right of the form keyword. For example, the following code will generate a form for adding a product variant to the cart and requires a product object as a parameter.
{% form "product", product %} ... {% endform %}To find a list of the various form types, head to the Shopify official docs, you can .
paginate
The paginate tag assists with pagination in Shopify themes. When wrapped around the loop you wish to paginate through, it will automatically limit the amount of results that show up by the number following the by keyword.
{% paginate collection.products by 5 %}
	{% for product in collection.products %}
        <!--show product details here -->
    {% endfor %}
{% endpaginate %}
raw
Raw allows you to output Liquid code on a page without it being parsed.
{% raw %}{{ 5 | plus: 6 }}{% endraw %} equals 11.The above code will look like this on the front-end: {{ 5 | plus: 6 }} equals 11.
style
The style tag in Liquid is a alternative to the standard HTML style tag. Using the Liquid version over the HTML one assists with live preview in the theme customiser.
{% style %}
    .hero__background-color-container {
    	background-color: {{ section.settings.background_color }}
    }
{% endstyle %}
Liquid Filters
Filters are simple methods that modify the output of numbers, strings, variables and objects and are denoted by a pipe character (|).
Using filters, you can modify a value in place (using output tags {{ }}) or assign a modified value to new variable.
{% assign downcased_title = product.title | downcase %}The above filter is called a 'string filter' as it takes a string and - in this case - makes all characters within it lowercase.
There are also filters that take a whole object and 'filter' out a particular attribute.
{{ product | img_url: '100x100' }}The above filter takes the product object and 'filters out' a url for the product with the dimensions set in the parameter (100px x 100px).
Shopify's documentation categorises Liquid filters via Array, Color, Font, HTML, Math, Money, String, URL and other filters.
Array filters
Arrays are one area in which the limitations of Liquid become apparent.
Shopify Liquid is like a dumbed down programming language and common things are often quite simple to achieve in Liquid (like the example above of outputting a product image) but things can get really tricky (and sometimes impossible) when trying to do more complex calculations.
One area where you will notice this is with arrays.
first and last
Using the filters first or last, you can access the first or last item in an array.
{{ product.tags | first }}Note that you could also access the first item of an array by its 0 index.
{{ product.tags[0] }}Changing the above number to 1 would give you access to the second item in the array, 2 to the third and so-on so-forth.
size
The size filter (when call on an array) returns the number of items in that array.
{{ collections.featured.products | size }}Note that you can also use the same filter on a string to return the amount of characters in that string.
{{ 'Learning Liquid is so fun!' | size }}The above code will return 26 as that is how many characters make up that particular string.
join
The join filter takes an array of values and converts it into a single string separated by the parameter that you set after the join keyword.
{{ product.tags | join: ', ' }}The above code will output a list of product tags as a string with each item separated by a comma.
concat
The concat filter enables you to combine two arrays together. However, it will not remove duplicate entries from the concatenated array unless you also use the uniq filter.
{% assign fruits = "apples, oranges, peaches, tomatoes" | split: ", " %}
{% assign vegetables = "broccoli, carrots, lettuce, tomatoes" | split: ", " %}
{% assign plants = fruits | concat: vegetables %}
The above 'plants' variable will contain an array with apples, oranges, peaches, tomatoes, broccoli, carrots, lettuce and tomatoes.
Note the 'split' filter. That one is considered a string filter that we will cover in a future section but in this example, it essentially does the opposite of the previous join filter.
map
The map filter allows you to create an array based on a nested attribute within another array.
{% assign collection_titles = collections | map: 'title' %}The above code creates an array of collection titles. You can think of it as a function that loops through all the collections, finds the title attribute for each and then creates a new array with all of those titles.
reverse
A simple array filter that reverses the order of an array.
sort
As the name suggests, the sort filter sorts the elements of an array by a given attribute of an element in the array.
{% assign products = collection.products | sort: 'price' %}
{% for product in products %}
	<h4>{{ product.title }}</h4>
{% endfor %}
When sorting numbers, it appears to sort from smallest to biggest and when sorting text, it appears to sort in alphabetical order with uppercase characters coming before lowercase characters.
If you'd like the order in reverse of that however, you can always chain a reverse filter to the end.
where
The where filter allows you to filter down an array based on a certain property and value for each item.
For example,
{% assign shoes = collection.products | where: "type", "kicks"%}
{% for product in shoes %}
	- {{ product.title }}
{% endfor %}
outputs the same as
{% for product in collection.products %}
	{% if product.type == "kicks" %}
    	- {{ product.title }}
    {% endif %}
{% endfor %}
uniq
The uniq filter (short for 'unique') filters out duplicate values in an array.
For example, if we take two lists which could have duplicate values and concatenate them, Liquid will not merge the duplicate values by default.
{% assign heavyweight = "Stipe, Daniel, Junior, Curtis, Derek" | split: ", " %}
{% assign pound4pound = "Jon, Henry, Stipe, Amanda" | split: ", " %}
{% assign fighters = heavyweight | concat: pound4pound %}
The fighters array in this instance would contain 'Stipe' twice as his name appears in both lists.
To fix this, we would simply chain a uniq filter on the end.
{% assign fighters = heavyweight | concat: pound4pound | uniq %}The fighters array will now contain each fighter's first name only once, even if it appears in both lists.
String Filters
Right up there with array filters in terms of importance (in my opinion) are the string filters which simply modify the output of strings.
There are over 30 different string filters in Liquid and so I won't go over all of them individually here but you can find the full list on the official docs.
append & prepend
append and prepend appends (adds a string value to the end of) and prepends (adds a string value to the beginning of) the string being acted on.
{{ ' Liquid ' | prepend: "Hello" | append: "fans!" }}The above Liquid tag will render as "Hello Liquid fans!".
upcase & downcase
As the names suggest, these filters will either captilize every letter of a string or lowercase every letter.
These filters are particularly useful for testing the equality of two strings as the equality operator "==" is case-sensitive.
For example:
{% assign product_type_1 = "Shoe" %}
{% assign product_type_2 = "shoe" %}
{% if product_type_1 == product_type_2 %}
	True
{% else %}
	False
{% endif %}
The above code will output 'False' as the 's' in shoe is a capital letter in one string and not the other.
To force the comparison to not be case-sensitive, we can simply make sure all the characters are converted to uppercase or lower case using the upcase or downcase filter before comparison like such:
{% assign product_type_1 = "Shoe" | downcase %}
{% assign product_type_2 = "shoe" | downcase %}
{% if product_type_1 == product_type_2 %}
	True
{% else %}
	False
{% endif %}
With the use of the downcase filter for both, the output will now be True instead of False.
remove, remove_first, replace and replace_first
As the names suggest, these filters remove or replace occurrences of a substring from a string.
removewill remove a substring from wherever it appears in the input stringremove_firstwill remove the first occurrence of a substring in the input stringreplacewill remove a substring from wherever it appears in the input string and replace it with another string that you specify, andreplace_firstwill replace the first occurrence of a substring in the input string
Here are all of them in action
{{ "Hello, world. Goodbye, world." | remove: "world" }} --> "Hello, . Goodbye, ."
{{ "Hello, world. Goodbye, world." | remove_first: "world" }} --> "Hello, . Goodbye, world."
{{ "Awesome Shoes" | replace: 'Awesome', 'Mega' }} --> "Mega Shoes"
{{ "Awesome Awesome Shoes" | replace_first: 'Awesome', 'Mega' }} --> "Mega Awesome Shoes"
strip, lstrip, rstrip, strip_html and strip_newlines
These are all filters for stripping content from a string. lstrip strips tabs, spaces, and newlines (all whitespace) from the left side of a string, rstrip does the same but for just the right side and strip does both (ie. strips whitespace from both sides).
As the names suggest, strip_html will remove any HTML tags from a string and strip_newlines will remove any new lines from a string.
truncate & truncatewords
truncate 'truncates' a string down to the number of characters passed as the first parameter with an ellipsis (...) appended to the end.
truncatewords on the other hand 'truncates' a string down to the a number of words (as opposed to characters).
Both filters will apply an ellipsis unless otherwise instructed and for truncate, the ellipsis is included in the character count.
See the official docs for more info.
url_encode, url_escape and url_param_escape
All of these filters assist in filtering out and replacing URL-unsafe characters in a string.
As it's often rare that you would need these, I'll refer you to the official docs to learn more about these filters and their differences.
md5, sha1, sha256, hmac_sha1 and hmac_sha256
These are rare filters which are all concerned with converting strings into 'hashes'. md5 converts a string into a MD5 hash, sha1 converts a string into a SHA-1 hash, sha256 into a SHA-256 hash and so on.
If you don't know what a hash is then don't worry. You probably don't need to know what these are.
camelcase
Camelcase is the practice of writing phrases such that each word or abbreviation in the middle of the phrase begins with a capital letter, with no intervening spaces or punctuation. Using the camelcase filter, you can convert a string to this particular format.
{{ 'coming-soon' | camelcase }}The above snippet will return "ComingSoon".
capitalize
The capitalize filter capitalizes the first word in a string.
escape
The escape filter is one that helps you to 'escape' HTML. You can think of it like strip_html but instead of simply removing HTML, the escape filter replaces it with special characters that are not 'parsed' by your browser.
If you escape a string before outputting it in Liquid, then the tags will show up rather than being interpreted as HTML.
For example, {{ '<h1>Hello!</h1>' | escape }} will return '<h1>Hello!</h1>' explicitly rather than create a H1 tag and the result in the HTML markup of you page would be <h1>Hello!</h1>
handle/handleize
The handleize filter formats a string into a Liquid handle. This is a process that happens automatically in Shopify when you create a new product, collection or similar. Just like how Shopify creates a handle out of your product title, you can perform that same process on any string with this filter.
newline_to_br
This one is pretty simple, it inserts a linebreak HTML tag (<code
) in front of each line break in a string.
pluralize
If you're outputting a unit value in Liquid, you can avoid using an if statement to determine the singular or pluralized version of the unit by using this pluralize filter.
For instance,
{{ cart.item_count }} {{ cart.item_count | pluralize: 'item', 'items' }}In this example, if the item count was 1, the output would be "1 item". If it was 3, the output would be "3 items".
split
We saw the split filter earlier when we were looking at array filters. It allows us to create an array from a string like such:
{% assign fruits = "apples, oranges, peaches, tomatoes" | split: ", " %}The above fruits object will now hold an array with an item for each fruit name.
slice
The slice filter allows us to create a substring. It takes two parameters, the first for the position at which to start cutting the string and second for the length of substring (defaults to 1 if no value is provided).
{{ "block-120" | slice: 6, 3 }}The above will slice the input string from after the dash and output the last part of the string, "120".
URL Filters
All files (including images, CSS files and Javascript files) that you upload to your Shopify store will be dynamically stored in Shopify's Content Delivery Network (CDN). This means that anytime you want to retrieve an asset in your theme, you're most likely going to have to use a URL filter.
These filters usually take a relative path or filename and turn it into fully formed URL. Let's have a look!
asset_url
This filter takes the filename of an asset in your theme's asset folder and returns a fully formed URL.
{{ 'shop.css' | asset_url }}The result of the above would look something like this //cdn.shopify.com/s/files/1/0087/0462/t/394/assets/shop.css?28253.
As you can see, you have the domain of cdn.shopify.com, followed by a few keywords, slashes and digits, followed by the directory/file name and ending with a version number for the asset.
This is what I mean by 'fully formed URL'. To figure out this URL ourselves is near impossible and that's why we need these filters.
img_url
As you may have guessed, the img_url filter generates a URL path to an image. It can be used in a variety of ways.
For instance,
{{ variant | img_url }},
{{ variant.image | img_url }}, and
{{ variant.image.src | img_url }}
... will all return the variant's image url.
As you can see, it's quite flexible and can be used directly on any product, variant, line item, collection, article or image object.
Usually, you'll want to pass in a parameter to control the size of the img with the filter. By default, Shopify will serve a 100px width version of your image which is usually too small. This encourages you to think about how large you actually need the image to be as you'll be specifying the exact width (and height if you like) of the image that gets served from the CDN.
To learn more about the size parameter as well as the other parameters like crop, scale and format, check out the official documentation.
asset_img_url
A hybrid of the last two, asset_img_url returns the asset URL of an image in the "assets" folder of a theme and also accepts an image size parameter.
{{ 'logo.png' | asset_img_url: '300x' }}file_url
Use this filter to form a url based on a filename that you've uploaded to the 'files' section of your Shopify admin.
{{ 'size-chart.pdf' | file_url }}file_img_url
Just like we saw with asset_url and asset_img_url, when the file we want to access from the files section of our store is an image, we can use the file_img_url filter to set an image size parameter.
{{ 'logo.png' | file_img_url: '1024x768' }}customer_login_link
This filter turns a string of your choice into a text link to the customer login page.
{{ 'Log in' | customer_login_link }}The above code would return something like this: Log in.
global_asset_url and shopify_asset_url
Both these filters allow you to access the url for 'global assets' that are found on Shopify's servers.
A full list of the different global assets can be found here on the official docs.
link_to, link_to_vendor, link_to_type, link_to_tag, link_to_add_tag and link_to_remove_tag
All of these filters help you create a link tag.
The first one, the generic link_to tag is simply an alternative to writing a link tag in HTML.
The code...
{{ 'Shopify' | link_to: 'https://www.shopify.com','A link to Shopify' }}... will render Shopify
The others take the name of a vendor, type or tag and generates a link to it.
link_to_vendor and link_to_type take an input string and create a link to filter by that vendor or type.
For instance,
{{ "Nike" | link_to_vendor }}... will create a link to a page with products of just the vendor "Nike" and...
{{ "jeans" | link_to_type }}... will create a link to a page with products with the type of "jeans".
link_to_tag works in exactly the same way but for tags, there are two additional filters that let you add and remove tags to/from your current list of tag filters.
This way, if you can provide users the option to filter by more than one tag.
For full details, check out the page on the official docs.
sort_by
This filter takes a collection url and adds the necessary query parameter to sort the results of a collection.
{{ collection.url | sort_by: 'best-selling' }}The above code would output something like /collections/widgets?sort_by=best-selling.
url_for_type and url_for_vendor
Similar to link_to_type and link_to_vendor, these generate just the url of a destination page that filters products by type and vendor.
within
The within filter creates a collection-aware product URL. Basically, it prepends /collections/collection-handle to a product URL, where collection-handle is the handle of the collection that is currently being viewed.
As it states in the docs,
When a product is collection-aware, its product template can access the collection output of the collection that it belongs to. This allows you to add in collection-related content, such as related products.
<a href="{{ product.url | within: collection }}">{{ product.title }}</a>payment_type_img_url
Finally, payment_type_img_url returns the URL of the payment type's SVG image. Used in conjunction with the shop.enabled_payment_types variable.
As it's not all that common, I'll refer you to the official docs to learn more about it.
HTML Filters
HTML Filters have a similar function to HTML helper functions in other programming languages. They create HTML elements based on Liquid properties or a store's assets.
img_tag
The img_tag filter simply acts as an alternative to writing an image tag in HTML with the added benefit of being able to extract an image url from an object containing an image.
What I mean by that is that you can use the filter to create a tag of an already formed url like so
{{ 'logo.png' | asset_url | img_tag: 'Company Logo', 'cssclass1 cssclass2' }}Where the first parameter is for the alt attribute of the image and the second is for any classes.
Or, you can call the filter directly on an object like so.
{{ collection | img_tag: 'alternate text', 'css-class', 'large' }}The optional third parameter is specifying the size of the resulting image and saves you from having to use an img_url filter before it in order to specify size.
stylesheet_tag and script_tag
These tags are handy for generating the necessary stylesheet and script tags for bringing stylesheets and javascript files into your project.
If you've dived into your theme.liquid file before, you might have seen something like this:
{{ 'application.css.scss' | asset_url | stylesheet_tag }}
{{ 'application.js' | asset_url | script_tag }}
Both of these tags take the filename of the asset and using the asset_url filter we saw earlier, it creates a fully-formed asset url and then creates the necessary tag to include the CSS and JS in the project.
currency_selector, payment_button, time_tag and payment_type_svg_tag
The other HTML filters assist in generating a drop-down list that customers can use to select an accepted currency on your storefront, creating a dynamic checkout button for a product, converting a timestamp into a tag and generating an <svg> tag of the requested payment type image for inlining purposes, respectively.
You can learn more about these less common filters on the official docs.
Math Filters
In Liquid, any math you wish to perform inside your templates needs to be done with the use of a Math filter.
The biggest limitation to using Math filters for mathematical operations is that filters in Liquid always operate left to right in a linear chain and therefore, there is no way to change the order of operations except for separating out complex calculations into multiple variables.
For instance, here are two examples I use in my Shopify Theme Programming class
{% assign average_price = 50 | plus: 20 | plus: 30 | divided_by: 3 %}In the above calculation, the left to right order of operations in Liquid actually produces the intended result. In regular math, you would need to use parentheses to make sure all the addition happens first before the division as division comes before addition in regular math.
What if for instance though, we have a customer who buys 2 shirts at $8 each. He also buys two pairs of shorts for $20 each that each get a $5 discount. Now, in order to control the order of operations, we need to separate parts of the equation into seperate variables and then combine them.
{% assign cost_of_shirts = 8 | times: 2 %}
{% assign cost_of_shorts = 20 | minus: 5 | times: 2 %}
{% assign cost = cost_of_shirts | plus: cost_of_shorts %}
As you can see, the Math filters in Liquid follow a pretty human readable naming convention.
If you would like to read about all the Math filters available in Liquid, you can do so here on the official docs.
Money Filters
Money filters are super simple (but handy) filters for formatting prices.
In Liquid, the raw value of a price is represented in cents (not dollars or euros) as technically, you can't have a price of lower than one cent. Therefore, in order to make your prices human-readable, you'll need to use a money filter.
- The
moneyfilter formats the price based on the shop's HTML without currency setting - The
money_with_currencyfilter formats the price based on the shop's HTML with currency setting. - The
money_without_trailing_zerosfilter formats the price based on the shop's HTML with currency setting and excludes the decimal point and trailing zeros. - Finally, the
money_without_currencyfilter formats the price using a decimal.
To go in-depth with money filters, check out the page on the official docs.
Other Filters
While Shopify's documentation organises the remaining filters by a few extra categories, I'll lump them altogether as we've already covered the most important ones.
Color Filters
As the name suggests, Color filters take a colour value (either a hex, hsla or rgba value) and modify it in some way.
{{ 'rgba(122, 181, 92, 0.5)' | color_to_hex }}The above example simply takes an rgba colour code and converts it to hex.
In this instance, the output would be #7ab55c.
You can read the full list of Color filters on Shopify's official documentation.
Font Filters
Font filters are to be used exclusively on font objects. You can use font filters to help load fonts or to obtain font variants.
Again, I'll refer to the official docs here if you'd like to learn more.
The rest
Looking through the remaining filters, I can see a few that I would find useful. One, the date filter for formatting a date, second, the default filter for specifying a default value and third, the json filter for exposing objects in JSON format to your front-end so that you can use them in Javascript.
If you'd like to read more about these filters as well as the 8 remaining, check out this page on the official documentation.
Conclusion
Whoosh! That was quite the blog post huh! I probably could have made this into an eBook instead but for now, this'll stay a blog post.
I know I went into a lot of detail here (and left out a lot of detail at the same time) but my intention was explain Shopify Liquid concepts rather than list off information that can already be found in the official documentation.
If you'd like to actually put what you've learned here today into practice, I've created a Skillshare class that takes the Shopify Liquid theory that you've learned in this post and applies it to an actual theme. Go check it out!
Otherwise, leave a comment below and let me know how you find the guide. Too much information? What would you like to know more about? Let me know!
Thanks for reading.
Until next time,
Chris
Keen to dive deeper into Shopify Liquid?

Why not check out my new video course on ShopifyThemeDeveloper.com?
💻 Check out the module